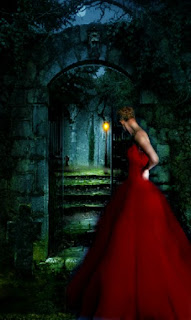
The picture above is one I call The Girl at the Gate. It's created from merging two pictures and recoloring them. It's not done but it's 80%. I created this picture without PhotoShop so currently it could only be used for e-books. If you want to know how to make it suitable for print, check the end of the blog post.
First I located a back ground. I downloaded my gothic enchanted arch from the stock photo selection of BigStockPhoto. It was fairly affordable. It was two credits or about 3.99 (before my bulk discount).
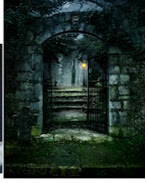

Isn't it pretty? It's dark but not scary. Romantic but not too pretty. I want a dark romantic feeling.
The harder part now is finding the girl. The truth is I like wedding dresses because they are so easy to recolor but a ball gown will work too. In this particular shot, I want a woman in a big gown either sad or looking away. I do not want any veils or elaborate backgrounds. A back of a dress would work too.
I found this great wedding dress shot on BigStockPhoto. It has a few problems. First it's white. Yes, white. Sigh.
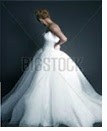
Second her hair is a bun or chignon or whatever fancy hair dressers call it. I'm not a hair person. If I could I'd shave my head and go through life with a buzz cut. But I being a woman of a large head and a bigger body, it's just not a good look for me.
But that's all fixable.
First, I go over to www.fotoflexer.com and load the arch. Then I hit Layer and add the woman. I drag the sizes to where I think they would be size friendly to each other. Proportion is everything.
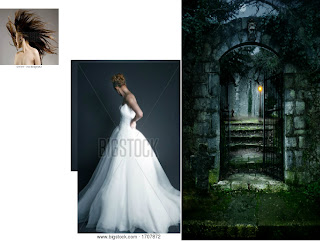
Then I take the combined picture and pop it into www.picnik.com. ** Picnik is now closed. Please use www.ipiccy.com instead. This is for easy copying.
Login and click Clone after you upload the picture.
One of the tricks to cloning is to start with the part that has to line up. Instead of starting with the head to copy, I suggest the bottom of the dress because that's where it has to hit the ground correctly. Clone is under the Advanced features.

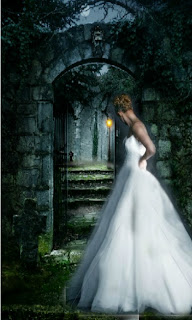
Here is the girl in the dress in the arch. I used Cloning to put her in there and I'll use Cloning to clean up the white spacing around her. See here I've recolored the dress. You can use the eye tones, the vampire eye colors...zombie coloring..personally I went with blood red here. Clown paint under the Halloween features give the brightest colors. Eye tones give the most subtle. Blood coloring gives...well a deep, deep red.
**Due to a system error, many of my pictures were deleted from this blog post.
Now that bun. I hate her bun. I go to the Clone Feature and paint the background over the features I don't want. If I wanted to give her long hair, I'd go back to fotoflexer and use the hair of another woman---I'd then clone it on.
Now everything I've done here can be done on PhotoShop but if you want it quick and dirty this will work.
Dirty Little Trick: Need to have it in 300 DPI or print quality? Then find someone PSE (Photoshop Elements). After you've blown the picture up as big as you can in Picnik, then load the large picture into PSE. Duplicate the picture. Then click the auto sharpen, then flatten the pictures back together. Add your text. Flatten the layers again.
Then go up to Image and Resize to 300DPI or better but make it 6 x 9 in size.
If you can't get your hands on Elements to resize it, then download GIMP. It's slow and annoying but it'll get it done for you. And it's free.
There, now you can make an ebook cover merging two covers.
Tirz
This version needs some touch up at the skirt and a few other tweaks but it's 80% there.

**Due to a system error, many of my pictures were deleted from this blog post.
First I located a back ground. I downloaded my gothic enchanted arch from the stock photo selection of BigStockPhoto. It was fairly affordable. It was two credits or about 3.99 (before my bulk discount).


Isn't it pretty? It's dark but not scary. Romantic but not too pretty. I want a dark romantic feeling.
The harder part now is finding the girl. The truth is I like wedding dresses because they are so easy to recolor but a ball gown will work too. In this particular shot, I want a woman in a big gown either sad or looking away. I do not want any veils or elaborate backgrounds. A back of a dress would work too.
I found this great wedding dress shot on BigStockPhoto. It has a few problems. First it's white. Yes, white. Sigh.

Second her hair is a bun or chignon or whatever fancy hair dressers call it. I'm not a hair person. If I could I'd shave my head and go through life with a buzz cut. But I being a woman of a large head and a bigger body, it's just not a good look for me.
But that's all fixable.
First, I go over to www.fotoflexer.com and load the arch. Then I hit Layer and add the woman. I drag the sizes to where I think they would be size friendly to each other. Proportion is everything.

Then I take the combined picture and pop it into www.picnik.com. ** Picnik is now closed. Please use www.ipiccy.com instead. This is for easy copying.
Login and click Clone after you upload the picture.
One of the tricks to cloning is to start with the part that has to line up. Instead of starting with the head to copy, I suggest the bottom of the dress because that's where it has to hit the ground correctly. Clone is under the Advanced features.

Here is the girl in the dress in the arch. I used Cloning to put her in there and I'll use Cloning to clean up the white spacing around her. See here I've recolored the dress. You can use the eye tones, the vampire eye colors...zombie coloring..personally I went with blood red here. Clown paint under the Halloween features give the brightest colors. Eye tones give the most subtle. Blood coloring gives...well a deep, deep red.
**Due to a system error, many of my pictures were deleted from this blog post.
Now that bun. I hate her bun. I go to the Clone Feature and paint the background over the features I don't want. If I wanted to give her long hair, I'd go back to fotoflexer and use the hair of another woman---I'd then clone it on.
Now everything I've done here can be done on PhotoShop but if you want it quick and dirty this will work.
Dirty Little Trick: Need to have it in 300 DPI or print quality? Then find someone PSE (Photoshop Elements). After you've blown the picture up as big as you can in Picnik, then load the large picture into PSE. Duplicate the picture. Then click the auto sharpen, then flatten the pictures back together. Add your text. Flatten the layers again.
Then go up to Image and Resize to 300DPI or better but make it 6 x 9 in size.
If you can't get your hands on Elements to resize it, then download GIMP. It's slow and annoying but it'll get it done for you. And it's free.
There, now you can make an ebook cover merging two covers.
Tirz
This version needs some touch up at the skirt and a few other tweaks but it's 80% there.

**Due to a system error, many of my pictures were deleted from this blog post.
No comments:
Post a Comment